Windows Tutorial
To create the first app in the electron js by using the visual studio code means read this tutorial this will help you.

Step 1: Create the Folder
- Create the file folder in the C folder.
- Go to the command prompt by clicking the folders on the upper side of your desktop screen.
- Type the command “ npm init”.
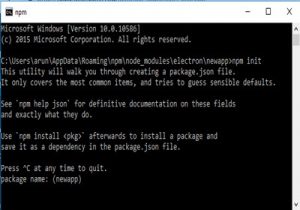
Now your package.json file will be created in the folder.
Step 2: Install the Electron
After doing the above steps install the electron by giving the command,
npm install --save-dev electronStep 3: At Visual Studio Code
- Go to the folder and double-tap the “package” file.
- This will open in the visual studio code.
{
 "name": "app3",
 "version": "1.0.0",
 "description": "test",
 "main": "main.js",
 "scripts": {
   "start": "electron .",
   "test": "echo \"Error: no test specified\" && exit 1"
 },
 "author": "",
 "license": "ISC",
 "devDependencies": {
   "electron": "^4.0.0"
 }
}
3. Tap your program name and create a new file.
4. Name the file as “node.js”.
5. Enter the following code,
const electron = require('electron')6. Again create a new file and name it as “main.js”.
7. Enter the following code,
const { app, BrowserWindow } = require('electron')
let win
function createWindow () {
win = new BrowserWindow({ width: 800, height: 600 })
win.loadFile('index.html')
win.webContents.openDevTools()
win.on('closed', () => {
  win = null
8. Again create a new file and name it as “index.html”.
9. Enter the following code,
<!DOCTYPE html>
<html>
 <head>
   <meta charset="UTF-8">
   <title>Hello World!</title>
 </head>
 <body>
   <h1>Hello World!</h1>
   We are using node <script>document.write(process.versions.node)</script>,
   Chrome <script>document.write(process.versions.chrome)</script>,
   and Electron <script>document.write(process.versions.electron)</script>.
 </body>
</html>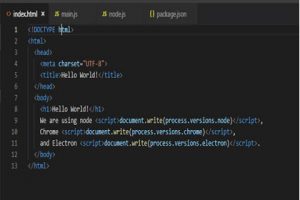
10. After completing these steps save the program again by clicking “ctrl+s”.
Step 4: Run the Program
- Go to the file folder and give the command “cmd”.
- Now your terminal gets open.
- Enter the command “npm start”.
- Now your program will debug and run.
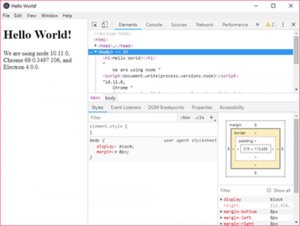
Output:
Error:
- I got the error in the package.json file.
- If you get the error means just change the line to,
- package.json module
- “main”: index.html “, and change this line as “main”: “main.js”,
- Then, run the program.
How to Install ElectronJS and Node.js in Windows
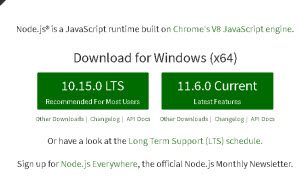
Node.js
- Visit Node.js official page.
- Tap Node.js Recommended version.

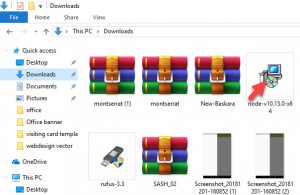
- Double-click the setup file.

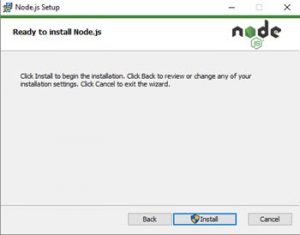
- Tap Install and then follow the command.

- Finally tap finish.
- Now you can see Node.js command on your Window.
Test it
Check out whether Node and npm are installed by running simple commands to know about their versions. Use command prompt
First test node by
$ node -vTest NPM by
$ npm -v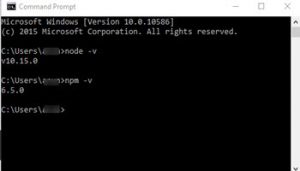
ElectronJS
Run the following commands to install electron globally.
$ mkdir electron-app

$ cd electron-app
This command is specially used to create an individual file for electron js.
Note: electron-app is my file name.
$ npm init -y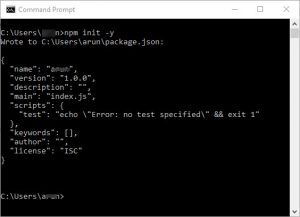
This command for creating package.json
$ npm install electron -g

$ npm install
This command is for installing npm.
$ npm install electron -saveThis command is used to install it as a development dependency in your apps.
This is the final command for install electron js.
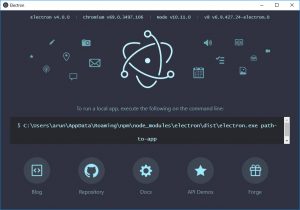
$ electron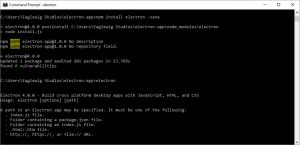
Now your electron js will be created.
If you want to install and runElectron API Demos,
Download and Install Git on your System.
On your command panel, run the following codes.
$ git clone https://github.com/electron/electron-api-demos
$ cd electron-api-demos
$ npm install
$ npm start
That's all.
I hope this tutorial will be useful for you. Thank you…


